“The only time to eat diet food is while you’re waiting for the steak to cook,” Julia Child once famously quipped. But honestly? I think she’d make an exception for a perfectly roasted leg of lamb, glistening with juices and smelling of garlic and rosemary! There is something undeniably primal and sophisticated about placing a massive roast on the table. It screams celebration. Whether you are prepping for Easter 2026 or just craving a Sunday roast that hits different, this dish is your ticket to culinary stardom. We aren’t just tossing meat in the oven here; we are crafting a memory. We are combining the rich, gamey flavor of lamb with the sharp, acidic bite of fresh mint sauce to cut through the fat. It’s a dance of flavors on your tongue! I’ve ruined a few roasts in my day—overcooked into shoe leather or under-seasoned into blandness—but this guide ensures you won’t make those same mistakes. Let’s get cooking.

Selecting the Best Cut: Bone-In vs. Boneless Leg of Lamb
So, you are standing at the meat counter staring at the different options. It can get a little confusing knowing which one to grab. Do you go for the one that looks like a giant drumstick or the tidy little roll? I’ve cooked both plenty of times, and honestly, the right choice just depends on how much work you want to do later.
Bone-in Leg of Lamb
This is the showstopper. If you want your table to look like a Norman Rockwell painting, get the bone-in. I personally think it tastes better, too. The bone adds a little extra flavor, and it helps the meat cook evenly because the bone heats up and cooks the roast from the inside out. The only downside? Carving it. You have to cut around the bone, which can be a bit of a puzzle if you haven’t done it before.
Boneless Leg of Lamb
This is basically the “easy button” for roasting. The butcher has already removed the bone and usually rolled the meat into a neat cylinder held together by netting. It’s super easy to carve—just slice straight down. The other big plus is that you can untie it, stuff the inside with your garlic and mint mixture, and tie it back up. That way, you get flavor in every single bite.
What to Look For
You will usually see two main types at the store: American and New Zealand (or Australian).
- American Lamb: These guys are usually fed grain, so the meat is bigger and has a milder, more steak-like flavor.
- New Zealand Lamb: These are smaller and grass-fed. They have that strong, distinctive “lamb” flavor. If you like gamey meat, pick this one.
How Much to Buy?
I always get nervous about running out of food, so I stick to these rules:
- Boneless: Plan on 1/2 pound per person.
- Bone-in: Since the bone takes up weight but you can’t eat it, aim for 3/4 pound per person.

The Secret Herb and Garlic Marinade
Okay, this is where the magic happens. You can buy the best piece of meat in the store, but if you don’t season it right, it’s just going to taste bland. Lamb loves strong flavors. It’s a rich meat, so it needs things like garlic and rosemary to stand up to it.
The Flavor Mix
For this recipe, I keep it simple but heavy on the aromatics. You need a lot of garlic. I’m talking 4 or 5 big cloves, peeled and sliced into little slivers. Then you need fresh rosemary. Dried is okay in a pinch, but fresh is way better here because it has those oils that release when it cooks. Combine that with some olive oil, salt, and plenty of cracked black pepper.
Getting the Flavor Inside
Don’t just rub the stuff on the outside. That flavor won’t go anywhere but the crust.
- Take a small paring knife and poke little holes all over the lamb.
- Push a sliver of garlic and a few rosemary leaves deep into each hole.
- It takes a few minutes, but trust me, when you slice into it later and find those pockets of roasted garlic, you will be so happy you did it.
Let It Sit
If you have time, do this the day before. Rub the whole thing down, wrap it in plastic, and throw it in the fridge overnight. The salt has time to work its way into the meat, which helps tenderize it. If you are rushing, try to at least give it an hour on the counter.
Room Temperature is Key
This is a big one that people forget. Never put cold meat straight into a hot oven. It cooks unevenly. Pull that lamb out of the fridge at least an hour before you want to roast it. It helps the meat relax and cook much more evenly.

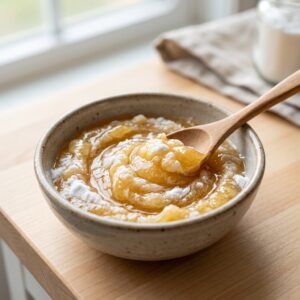
Mastering the Classic Fresh Mint Sauce
I used to think mint sauce was that bright green jelly you buy in a jar. You know the one. It’s sweet and kind of weirdly solid. But once I tried real, homemade mint sauce, I never went back. This isn’t a jelly. It is a vinegar-based sauce that is runny, sharp, and tangy.
Why You Need It
Lamb is a pretty fatty meat. That’s why it tastes so good. But that rich fat can coat your mouth after a few bites. The vinegar in this sauce cuts right through that grease. It balances everything out so you can eat more without feeling weighed down.
How to Make It
It is super simple, but you have to do it a little bit ahead of time.
- Get Fresh Mint: Buy a big bunch. Wash it and pull the leaves off the tough stems.
- Chop Carefully: Put the leaves on a cutting board. I like to sprinkle a little sugar on the leaves before I chop them. The sugar acts like grit and helps grind the leaves up without turning them into a black mush. You want nice little green confetti pieces.
- The Mix: Put the chopped mint in a small bowl. Add a tablespoon or two of sugar and a tiny splash of boiling water just to dissolve the sugar grains. Then, pour in your vinegar. I use malt vinegar if I want that strong, classic taste, but white wine vinegar is good if you want it a bit lighter.
- The Hardest Part: You have to wait. Let it sit on the counter for at least an hour. The vinegar needs time to pull the flavor out of the mint leaves. If you eat it right away, it mostly just tastes like plain vinegar.
Don’t skip this step. The sauce is what ties the whole meal together.

Roasting Temperatures and Internal Doneness
Okay, cooking the lamb. This is the part that used to scare me the most. You don’t want to ruin a big expensive piece of meat. But it is actually pretty simple if you follow the steps.
The Searing Phase
First, we want color. Brown food tastes good. Preheat your oven hot—like 450°F (230°C). Put the lamb in for about 15 or 20 minutes. You will hear it sizzling and smelling great. This blasts the outside and creates that nice tasty crust. If you skip this, the meat looks kind of gray and sad.
The Low and Slow
After that quick blast, turn the oven down. Drop it to 325°F (160°C). This lets the inside cook without burning the outside. If you leave it on high the whole time, you’ll have a burnt outside and a raw middle. Nobody wants that.
Using a Meat Thermometer
Please, buy a meat thermometer. They are cheap and they save your dinner. Do not guess by poking it with your finger. Stick the probe into the thickest part of the meat (don’t touch the bone if there is one).
Here is what to look for:
- Rare: 125°F (52°C) – It’s very red.
- Medium-Rare: 130°F to 135°F (54°C to 57°C) – This is the sweet spot. It’s pink and juicy.
- Medium: 135°F to 140°F (57°C to 60°C) – Less pink, a bit firmer.
Carryover Cooking
This is a science thing. When you take the meat out of the oven, it doesn’t stop cooking right away. The heat is still inside moving around. The temperature will go up another 5 or 10 degrees while it sits on the counter. So, if you want it to be 135°F, take it out when it hits 125°F or 130°F. If you wait until it hits 135°F in the oven, it will be overcooked by the time you eat.

Resting, Carving, and Serving
You pulled the lamb out of the oven. It smells amazing. The garlic and rosemary smell is filling the whole kitchen, and you are starving. But stop! Put the knife down. This is the hardest part, but you have to do it.
The Importance of Rest
If you cut into that meat right now, all the juice is going to run out onto the cutting board. Your meat will end up dry and tough, and you’ll have a puddle of expensive flavor wasted.
- Take the lamb out of the roasting pan.
- Put it on a carving board (preferably one with a groove to catch drips).
- Cover it loosely with a piece of aluminum foil.
- Wait 20 to 30 minutes.
During this time, the juices inside the meat calm down and move back to the center. This makes every slice tender. Use this time to finish your gravy or set the table.
Carving Techniques
Okay, time to eat. If you bought the boneless roast, you are lucky. Just cut straight slices across the grain. Keep them about a quarter-inch thick.
If you have the bone-in leg:
- Hold the bone with a paper towel so you don’t burn your hand.
- Slice perpendicular to the bone (straight down until you hit hard bone).
- Then, turn your knife sideways and slice along the bone to release all those beautiful pieces you just cut.
- Don’t worry if it looks a little messy. It all tastes the same!
Plating and Sides
I like to put the sliced meat on a big warm platter. (Pro tip: run your platter under hot water and dry it off so it doesn’t cool the meat down). Spoon some of that fresh mint sauce right over the meat so it soaks in a little, or put it in a bowl on the side so people can take as much as they want.
Serve this with roasted potatoes—I usually throw them in the bottom of the roasting pan so they cook in the lamb fat—and maybe some green beans or asparagus. That’s it. You did it!

There you go. That is pretty much everything you need to know. Roasting a leg of lamb looks hard, but it is actually one of the easiest big meals to make. You just season it, pop it in the oven, and wait.
The fresh mint sauce is the real trick here. It cuts the fat and makes the whole thing taste bright and fresh. Don’t stress about getting it perfect the first time. Even if it is a little overcooked, the gravy will save it.
If this helped you out, do me a favor and save this pin to your Pinterest board for 2026. It helps other people find the recipe, and you won’t lose it for next Easter. Happy cooking!